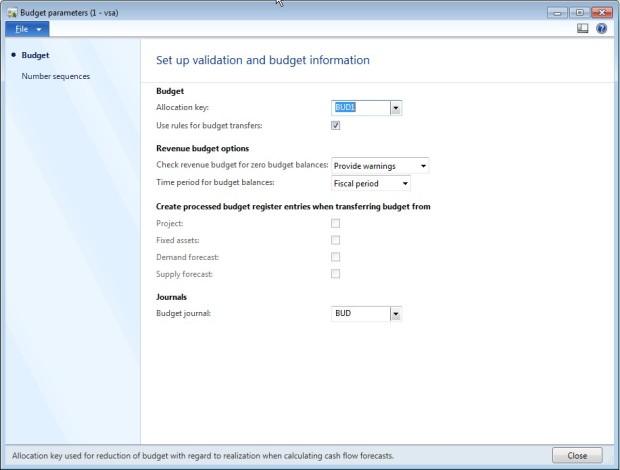
Create a budget entry
how to enter a budget manually in Dynamics AX 2012.


Create a budget entry
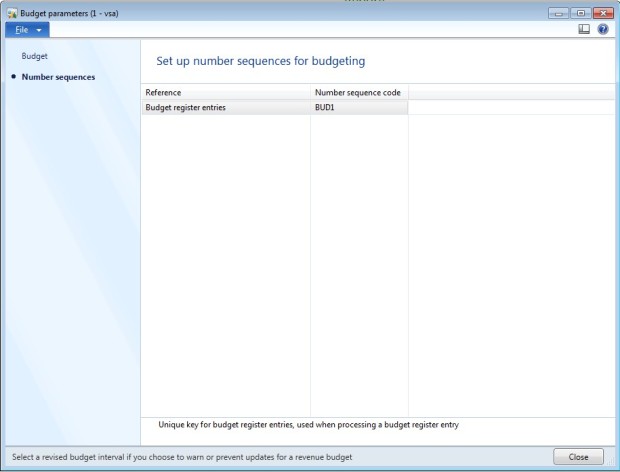
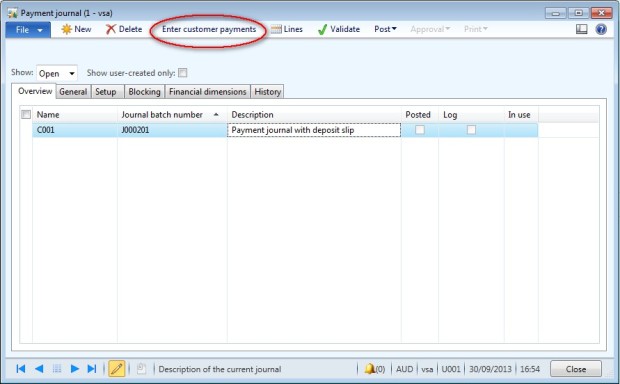
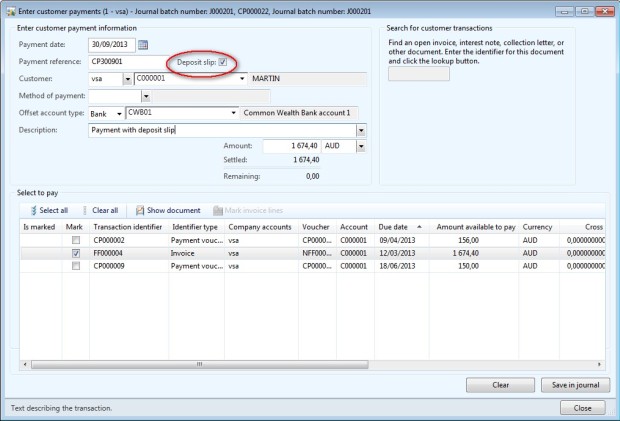
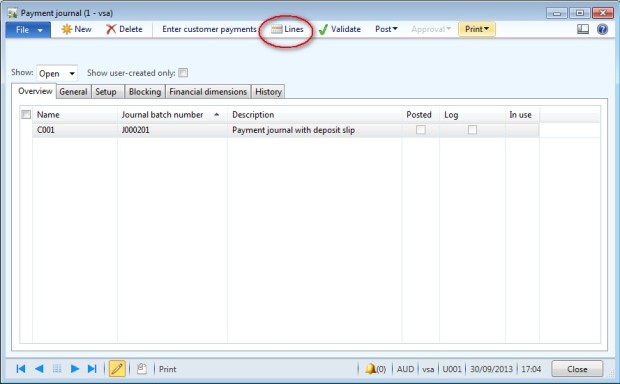
Access: Budgeting > Common > Budget register entries > New- In the “budget register entry” tab, select : a budget model, a budget code and the date for the budget period.
- In the “budget account entries” tab, click on “Add line” and enter : the account structure, the account and dimension (depends of dimensions set up for budgeting) and the amount of the budget.
- When all the entries are written, click on “Update budget balances”. If the budget balances are not updated, the status of the budget is “Draft” and not “Completed”.
Create a budget transfer
how to enter a budget transfer in Dynamics AX 2012.


Access: Budgeting > Common > Budget register entries > New


In Budgeting > Inquiries > Actual vs Budget, you can check the value of the budget.


1/Create a budget transfer
You can create budget transfers by creating a budget register entry that has a budget code that is associated with the Transfer
budget type. You decrease the budget of one or more financial dimension
values, and then increase the budget of other financial dimension
values by the same amount.
Access: Budgeting > Common > Budget register entries > New-
In the Budget register entry tab, select the budget model and the budget code with a budget type = transfer
-
In the Budget account entries grid, click Add line.
-
Enter the account structure and financial dimension values to transfer a budget amount from (negative amount)
-
Enter a second line with the account structure and financial dimension values that you want to transfer the budget amount to (positive amount)
-
Click on Update budget balances to valid the transfer
-
Remark: If workflow is activated for the budget code, a message informs you that the budget transfer request was submitted to workflow.
2/ Create a budget transfer when you are creating another entry
You can create a budget transfer when you are creating a budget register entry. In this case, you can create a transfer from any of the budget types, such as Original budget or Revision.Access: Budgeting > Common > Budget register entries > New
-
In the Budget register entry tab, select the budget model and the budget code (like a regular entry).
-
In the Budget account entries grid, click Add line.
-
Enter the date, account structure, financial dimension values, amount, and amount type. And save the line
-
Click on Create transfer
-
In the “Create Transfer” form, select the destination of the transfer in the top of th form, and create a line for the source of the transfer.
-
The transaction total should be equal to 0.
-
Click on “Update budget balances”
- Click on “Update budget balances” to enter the budget entry.
In Budgeting > Inquiries > Actual vs Budget, you can check the value of the budget.
- In the tab “Select”, enter a new filter with the budget value
- Select other options (Budget model, fiscal year, …) and click on “Update totals”
- In this example, I have an original entry = 10 000 and 2 transfers (1st = -5000 and 2nd = -400).