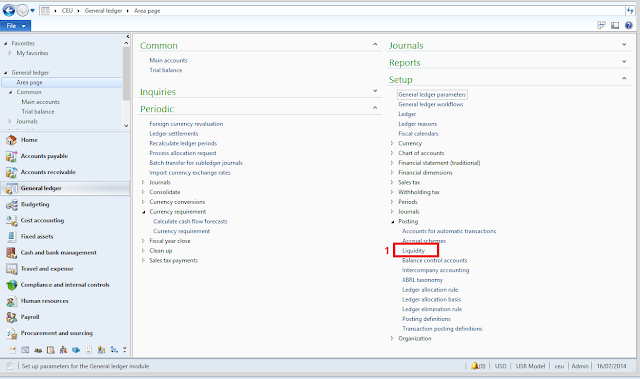
This article describes how to setup and use ledger allocation rules in Dynamics AX 2012. This functionnality can be use to allocate a global amount in several combinations of account/financial dimension. The key of the repartition can be fixed or linked to an other account. In an allocation rule, there are several components:
- the source: select the account/dimension you want to allocate. The total of the amount from all the journals will be the base of the allocation.
- the destination: select all the combinations of account/dimensions that will receive an amount.
- the rule: select the way of calculation of the allocation. It can be fixed (enter directly a pourcentage) or variable (with a linked to an other account for example).
The allocation rule, can be setup with several methods:
- Option A: Basis allocation method
- Option B: Fixed percentage method
- Option C: Fixed weight
- Option D: Distribute the source document amount equally.
To illustrate this Dynamics AX functionality, I will use an example: the accountant want to allocate the amount of the insurance of the budget “004” into 3 different budgets. The amount of the insurance to allocate is in the account 616000-004.
- Option A: the allocation rule is based on the amount of the property rental (account 613200) for each budget.
- Option B: the allocation rule is based on a fixe percentage: 10%for budget 001, 35% for budget 002 and 55% for budget 003.
Prerequisites
Before using allocation rule, you need to create a new Journal name with the journal type “Allocation”
Access: GL > Setup > Journals > Journals names
- Create a new journal
- Select the journal type “Allocation”
- Select a voucher series.
Option A: Basis allocation method
You need to use a basis when you want to allocate an amount in several combination of main accounts and dimensions based on another main account/dimension amount. In the case of a basis method, you need to setup a “Ledger allocation basis”.
With the example, I have an amount of insurance charge from a budget (account 61600 with budget 004) that I want to allocate in 3 others budgets. The allocation is based on the amount of the property rental (account 613200) for each budget:
- Insurance charge to allocate : account 616000 – 004 = $12000
- Destination of my allocation : 616000 – 001 / 616000 – 002 / 616000 – 003
- Base of the repartition : Amount of the account 613200 for each budget (001, 002 and 003).
- Amount in the accounting :
- 613200 – 001 = 10000
- 613200 – 002 = 15000
- 613200 – 003 = 25000
Step 1 : Create ledger allocation basis
Access: GL > Setup > Posting > Ledger allocation basis
- Create one basis rule for each combination of account/dimension. In the example we need to create 3 rules.
- Enter a description
- Click on Basis
- Create a first line and select “Main account” in “Field setting”,
- In “Source criteria”, select the main account. In the example, the value 613200,
- Create a second line and select “Financial Dimension” in “Field setting”,
- In financial dimension filed, select the dimension you need. In the example, it is “budget”,
- In “Source criteria”, select the main account. For the first rule, it is “001”.
- Create two other rules with the 2 other budget values.
- Click on active of each ledger allocation basis.
Step 2: Create ledger allocation rules
Access: GL > Setup > Posting > Ledger allocation rules
- Create a new ledger allocation rule
- Enter a description
- Go to the “General” tab,
- Select the allocation method “Basis”,
- Select a journal name .
- Go to the Offset tab,
- Select the offset account. In the example, I want to credit the same account used in the source (61600-004) to have a zero balance after the allocation.
- Click on “Source”
- Select the main account. In the example, the value is the main account 616000.
- You can create an other line to add a financial dimension. In the example, I add a second line with the dimension Budget.
- Click on “Destination”
- Create a first line with the first Basis rule. Select the Basis rule, the ledger account and financial dimension of the destination (616000-001)
- Create a second line with the second basis rule and the ledger account and financial dimension of the destination (616000-002).
- Create a third line with the third basis rule and the ledger account and financial dimension of the destination (616000-003).
- Go back to the first form and active the rule.
Step 3: Execute allocation rule
In the example, we want to have this results:
Access: GL > Periodic > Process allocation request
- Select the allocation rule,
- Select the start date to retreive amount for the allocation,
- In proposal option, select “Proposal only” to be able to check the journal or “Post anly” to directly post the journal.
Access: GL > Journals > Allocation
- Open the new allocation journal created by Dynamics AX.
- Post the journal if all is OK.
- In the example, I have the amount of the account 616000-004 is allocate into the 3 other budgets according to the amount of the account 613200 for each budget.
Option B: Fixed percentage method
With the example, I have an amount of insurance charge from a budget (account 61600 with budget 004) that I want to allocate in 3 others budgets. The allocation is based on fixed percentage:
- Insurance charge to allocate : account 616000 – 004 = $12000
- Destination of my allocation : 616000 – 001 / 616000 – 002 / 616000 – 003
- Base of the repartition : 10% for budget 001, 35% for budget 002 and 55% for budget 003
Step 1: Create ledger allocation rule
Access: GL > Setup > Posting > Ledger allocation rules
- Create a new ledger allocation rule
- Enter a description
- When the rule is created, don’t forget to click on “Active” to be able to use it.
- Go to the tab “General”
- Select the allocation method “Fixed percentage”
- Select a journal name.
- Go to the tab “Offset”
- In this example, I want to reversing the initial account/dimension, so I select Source. But you can specifed an other account.
- Click on “Source”
- Create a new line and select the main account. in the example the value is 616000.
- Create a second line and select the financial dimension “Budget” with the value 004 for this example.
- Click on “Destination”
- Create a first line for the first destination : account 616000-001 with the fixed percentage 10%
- Create a second line for the second dimension 002: account 616000-002 with fixed percentage 35%
- Create a third line for the the third dimension 003: account 616000-003 with fixed percentage 55%
- Check that the total percentage is equal to 100.
Step 2: Execute allocation rule
Access: GL > Periodic > Process allocation request
- Select the allocation rule,
- Select the start date to retreive amount for the basis of the allocation,
- In proposal option, select “Proposal only” to be able to check the journal or “Post anly” to directly post the journal.
Access: GL > Journals > Allocation
- Open the new allocation journal.
- Post the journal if all is OK.
- In the example, I have the amount of the account 616000-004 is allocate into the 3 other budgets according to the percentage of the rule.