Using Advanced Rules for Account structures in Microsoft Dynamics AX 2012
Using financial dimensions and controlling them appropriately in general ledger transactions is always one of the key requirements of ERP implementations.
All of us must be aware that creating and managing many financial dimensions had restrictions and was not as convenient as it is in AX 2012.AX 2012 now allows to create unlimited number of financial dimensions in the GL > Setup > Financial dimensions form. But in the account structures, there is a limitation which allows only “10 dimension segments” to be configured with the main account node.
In most scenarios, the requirement of having financial dimensions will not exceed 10, but there can be cases where business may need to have more than 10 financial dimensions to be used. In such scenarios,we can make use of the “Advanced rules” in the account structures.
Now let us take a look at the steps to configure the “Advanced rules” for an account structure and then look at how it can enable the 11th dimension.
- For this post, I have configured the initial 10 dimension segments already in CONTOSO as shown in screen above.
- With only this 10 dimension segments, system will allow to record only 10 dimensions in the transactions as can be seen in screen below.
- Now let us configure advanced rules for this account structure. Prior to setting up advanced rules, we need to create the advanced rule structures under GL > Setup > Chart of accounts > Advanced rule structures.
- Go to GL > Setup > Chart of accounts > Advanced rule structures and click New and key in a name and description.
- Let us say we will add the Worker as the 11th dimension in this case. Click Add segment and Select worker.
- Note that you can also configure the advanced rules have several combinations just like the segments in the main account structure. But in this case I will not configure it.
- In this case we will just activate the advanced rule structure. Click Activate button.
- Now, let us go back to the Configure account structure form and set up advanced rules for one the account structures. Go to GL > Setup > COA > Configure account structres.
- Select the Account structure and click Advanced rule button.
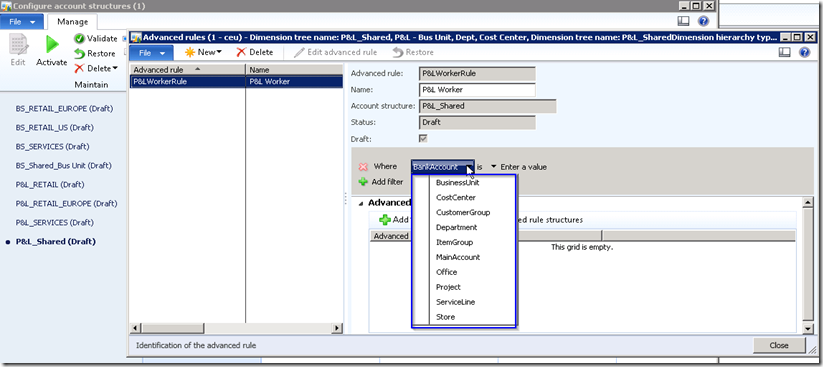
- Click New and key in Rule ID and name and then click OK button.
- Note here that you can also configure the advanced rules only for specific values/conditions for the existing 10 dimensions by adding necessary filters. I will not demonstrate the steps here in this post.
- Click Add and select the advanced rule structure that we created in step above.
- And we are done. Not let us activate the account structure and see in the transactions that we can have more than 10 dimension segments.
- Go to GL > Journals > General Journal and create a new journal.


No comments:
Post a Comment