Sales tax setup
This article describes how to setup sales tax in Dynamics AX2012
1/ Introduction
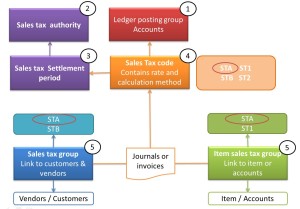
In Dynamics AX, there are several elements to create for the sales tax functionality:
- Ledger posting group: this element contains all ledger accounts.
- Sales tax code: this element contains the sale tax rate and the calculation method (rounding).
- Sales tax group: this element is the link between the sales tax code and customer/vendor.
- Item sales tax group: this element is the link between the sales tax code and the item.
- Sales tax settlement period: this element contains the period of payment of the sales tax.
- Sales tax authority: this element is linked to the settlement period. It can be linked to a vendor to automize the payment.
To setup the sales tax, you must follow the order below:
2/ Step 1: Ledger posting group
Access: General Ledger > Setup > Sales tax > Ledger posting groups
- Click new to create a new ledger posting group.
- In the field “ledger posting group”: enter a unique code.
- In the field “description”: enter a description.
- On the General tab, enter the ledger account to use.
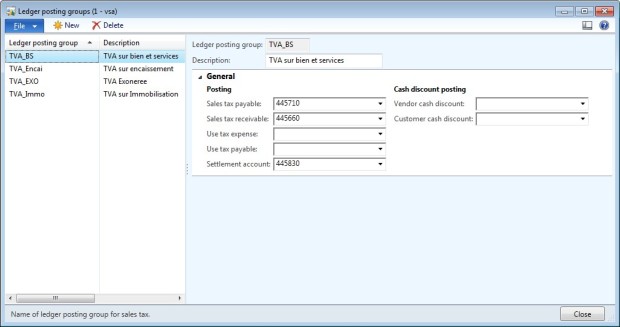
Description of the accounts:
- Sales tax payable: account use in a customer invoice. It is the sale tax to pay at the authority.
- Sales tax recevable: account use in a vendor invoice. it is the tax deductible.
- Use tax expense: account use when the sales tax is due on a payment and not on the customer invoice.
- Use tax payable: account use when the sales tax is due on a payment and not on the vendor invoice.
- Settlement account: account use for the payment of the tax.
- Vendor cash discount: account number of cash discount payable.
- Customer cash discount: account number of cash discount granted.
3/ Step 2: Sales tax authority
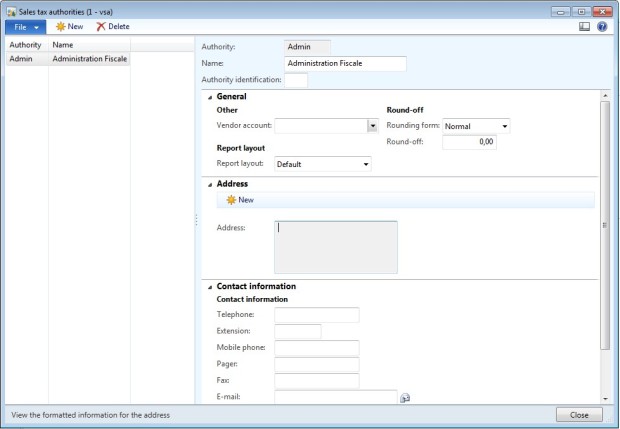
Access: General Ledger > Setup > Sales tax > Sales tax authorities
- Click new to create a new sales tax authority. You must created one at least.
- Enter a code in the “Authority” field
- Enter a name/description in the “Name” field.
- You can link the authority to a vendor account.
4/ Step 3: Sales tax settlement period
Access: General Ledger > Setup > Sales tax > Sales tax settlement periods
- Click new to create a new sales tax settlement period.
- Enter a code in the “Settlement period” field
- Enter a description
- Select a Terms of payment (link to the AP>Setup>Payment>Terms of payment screen)
- Select the authority created in the preceding step.
- Choose you period interval and the number of units: Months/1 for a monthly payment, Months/3 for a payment every quarter…
- Create the first single period (select from date and to date) and click on “New period” button in the top of the screen to create the next periods.
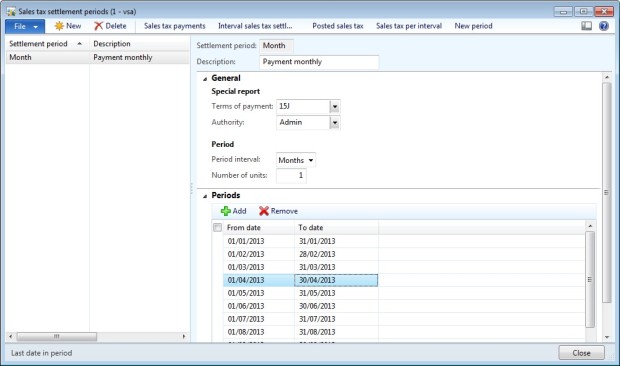
Remark : add the last step in the task list of the end of year to create all the single periods of the new year.
5/ Step 4: Sales tax codes
Access: General Ledger > Setup > Sales tax > Sales tax codes
- Click on New to create a new sales tax code
- Enter the sales tax codes (choose a short one if you want to print it in the statement).
- Enter the full name in the “Name” field.
- Select the settlement period (created in step 3).
- Select the ledger posting group for this code (created in step 1).
- Select ohter option: currency, print code, calculations parameters, …
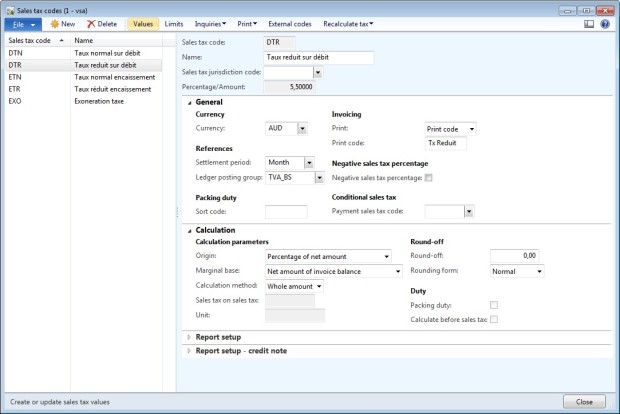
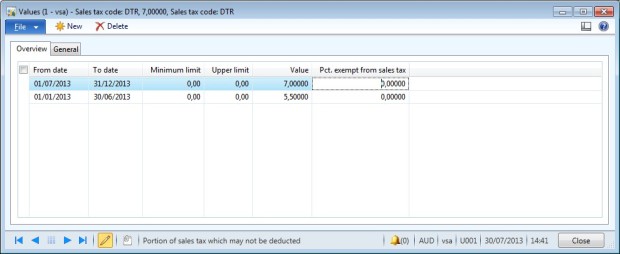
- Click on “Values” to add a rate.
- You don’t need to enter dates for the first rate (if there is only one rate).
- You can enter a rate by amount range, and choose the option “interval” in the calculation method.
Remarks:
- If the rate of a sales tax change, you don’t have to create a new code, but just add a new rate in the value screen with the start date, and add an end date to the old rate.
- When you create a sales tax code, don’t put the rate in the name, because the rate can change.
6/ Step 5: Sales tax group
Access: General Ledger > Setup > Sales tax > Sales tax groups
To identify the number of group you need, look for the criteria of the application of the sales tax related to the customer or the vendor. Example: national or international customer, vendor with VAT on invoice or VAT on cash receipt, vendor of goods or fixed assets vendor, …
- Click New to create a new sales tax group.
- Enter the code of the sales tax group.
- Enter a description.
- In the tab “Setup” add all the sales tax codes than can be suitable for the sales tax group.
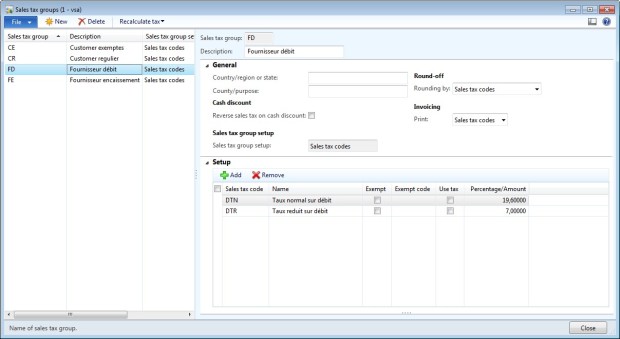
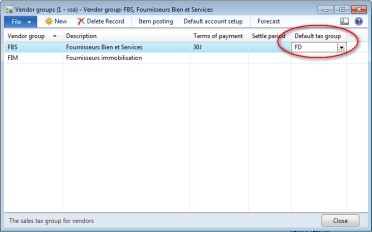
- The sales tax group will be link to the vendor/customer by the vendor/customer group or directly on the vendor/customer screen.
7/ Step 6: Item sales tax group
Access: General Ledger > Setup > Sales tax > Item sales tax groups
To identify the number of group you need, look for the criteria of the application of the sales tax related to the items. Example: item with normal rate or with reduced rate, exempted item, …
- Click New to create a new item sales tax group
- Enter a code to the item sales tax group.
- Enter a description.
- In the tab “Setup” add all the sales tax codes than can be suitable for the item sales tax group.
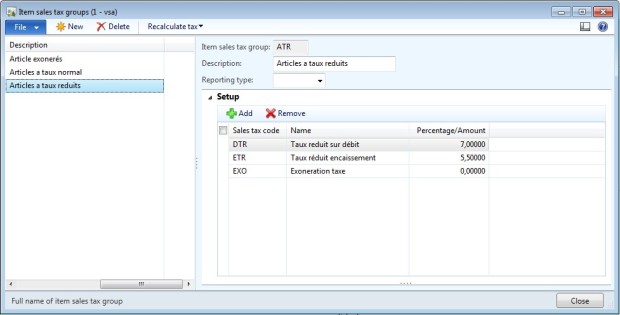
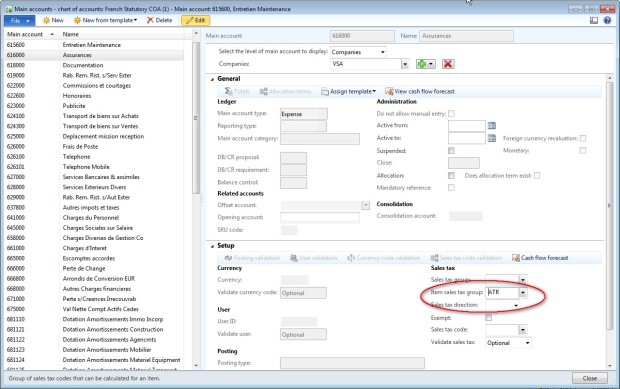
- The item sales tax group can be linked to the item or to a general account (if the account is setup at the company level).
8/ Example for customer invoices
The ABC company need 4 sales tax codes for the customer invoices:
- Sales tax with normal rate for national customer (code STNN)
- Sales tax with normal rate for international customer (code STIN)
- Sales tax with reduced rate for national customer (code STNR)
- Sales tax with reduced rate for international customer (code STIR)
We need to create 2 sales tax groups :
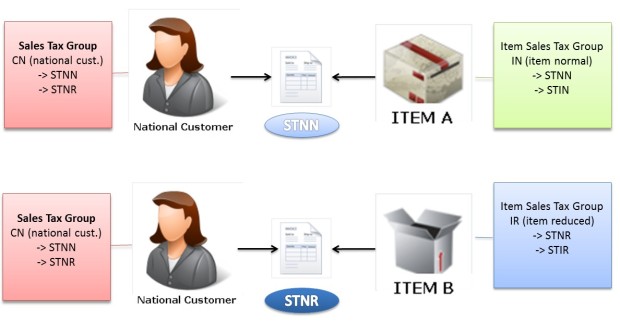
- One group for the national customers (code CN): with the sales tax codes STNN & STNR
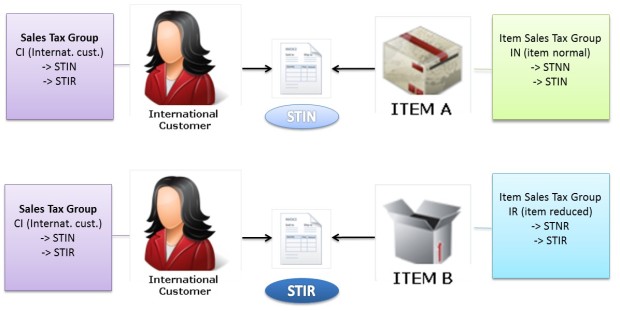
- One group for the international customers (code CI): with the sales tax codes STIN & STIR
We need to create 2 item sales tax groups:
- One for the normal rate (code IN): with the sales tax codes STNN $ STIN
- One for the reduced rate (code IR): with the sales tax codes STNR & STIR
Sales tax code deduced from a sale to a national customer:
Sales tax code deduced from a sale to an international customer:
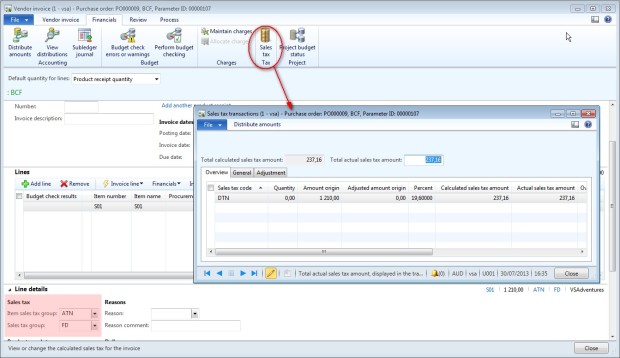
9/ Example in a vendor invoice
Access: Accounts payable > Common > Purchase order > All purchase orders > Invoice
No comments:
Post a Comment