General journal with approval workflow
This article describe how to use a general ledger journal with an approval workflow in Dynamcis AX2012.
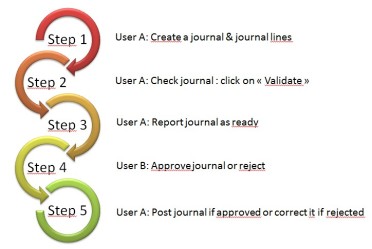
When you active an approval workflow, the process of creating and validating accounting journals have more steps:
1/ User A: Create a journal & journal lines
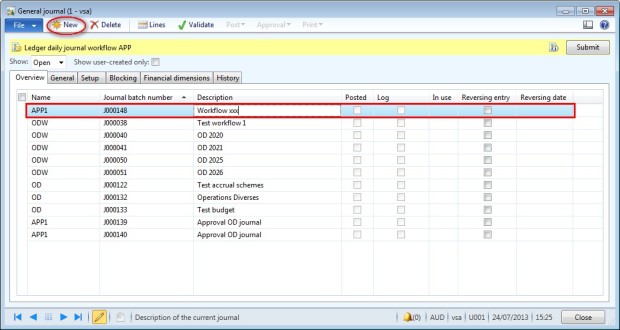
Access: General Ledger > Journals > General journal
- Create a new journal
- Select a journal name. If the journal is setup with a workflow, a yellow information bar must appear on the top of the screen.
- Enter a description.
- Click on “Lines”
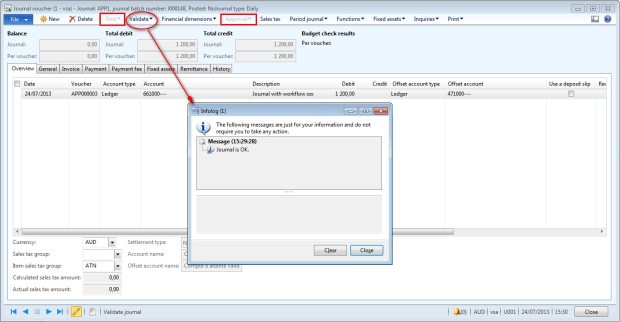
- Enter data as a regular general journal.
2/ User A: Check journal: click on “Validate”
- Click on “Validate” to check if the journal is OK.
- Button “Post” and 1pproval” are not available.
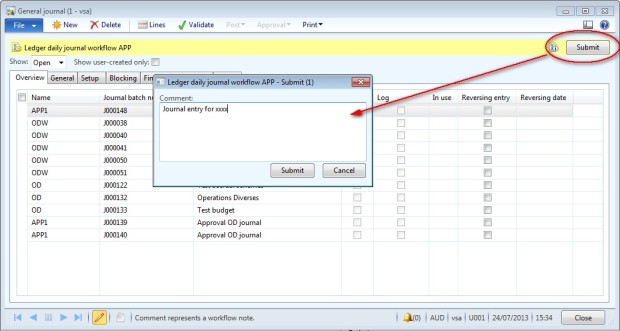
3/ User A: Report journal as ready
- Go back to the General journal screen (header of the journal)
- Click on “Submit”
- Enter a comment for the user B.
4/ User B: approve or reject the journal
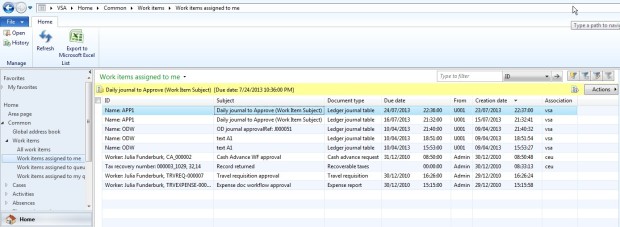
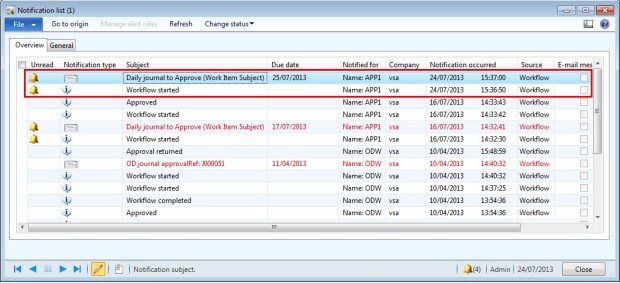
- The user B receive a notification : go to the list of work item or just click on the “notification” button in the bottom of the screen (bell).
- The text of the notification depends on the setting. You can add several references to help the user B to find easily the journal to be approved.
Access: Home > Common > Work items > Work items assign to me
Or notification list:
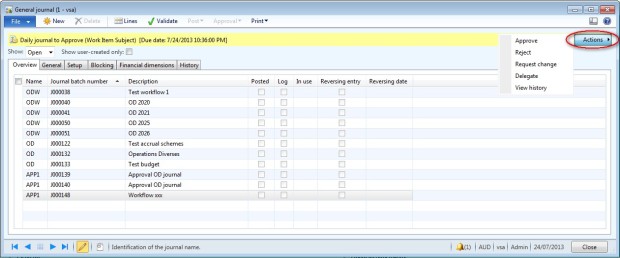
- Click on button “Go to origin” or go to the general journal screen
- After checking the journal, clik on “Action” and approve (or reject) the journal
5/ User A: Post journal or correct it.
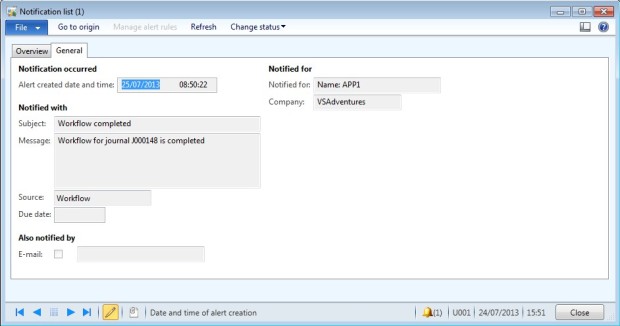
- When the approval is completed, the user A receive a notification.
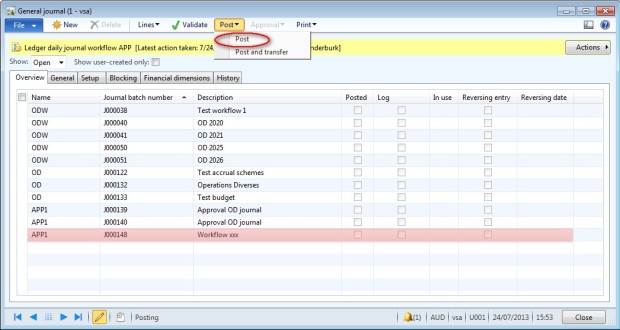
- If the journal has been approved, the journal can be posted.
- Click on Post > Post.
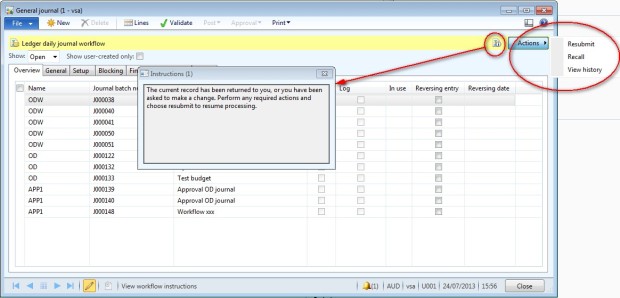
- If the journal has been rejected, the journal can not be posted.
- Click on “Lines” to update the journal.
- Clicl on Action > Resubmit to send the journal to the User B.
No comments:
Post a Comment