This article describes how to use the payment journal in the accounts receivable module of Dynamics AX 2012. There are several options to do the payment flow:
- Option A: payment journal and Enter customer payments form.
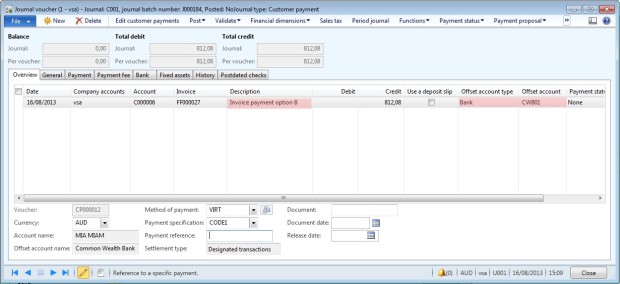
- Option B: payment journal and settlement function.
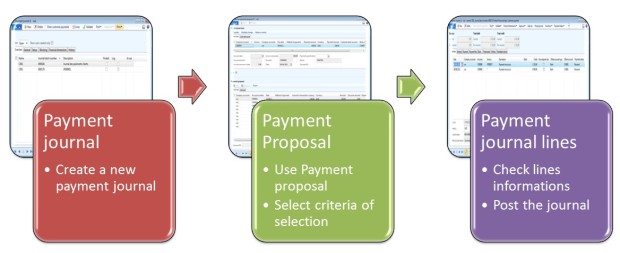
- Option C: payment journal and payment proposal.
- Option D: payment journal and posting in Payments Transfers form.
Option A: Payment journal & Enter customer payment form
This option is useful when we need to create payments for one or a few customers.
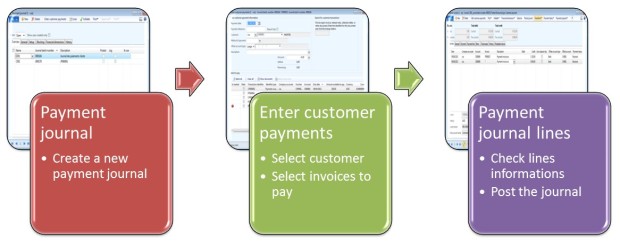
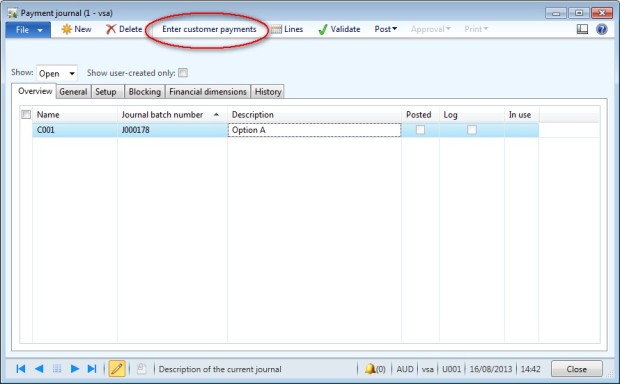
Access: AR > Journal > Payments > Payment journal
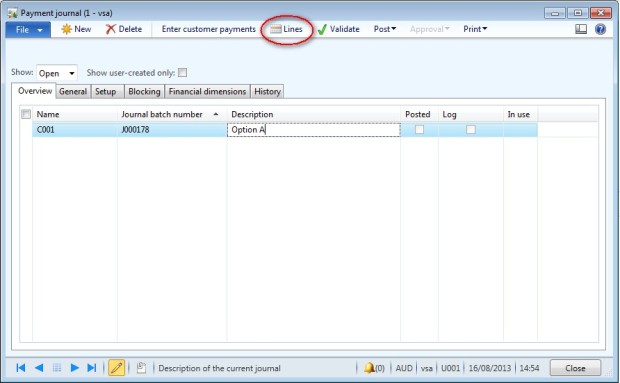
- Create a new journal : click on new
- Select a journal name
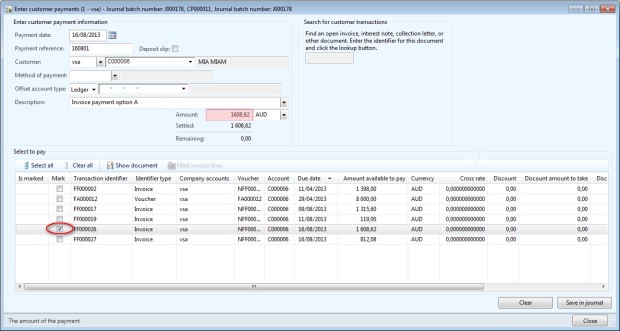
- Click on “Enter customer payments”
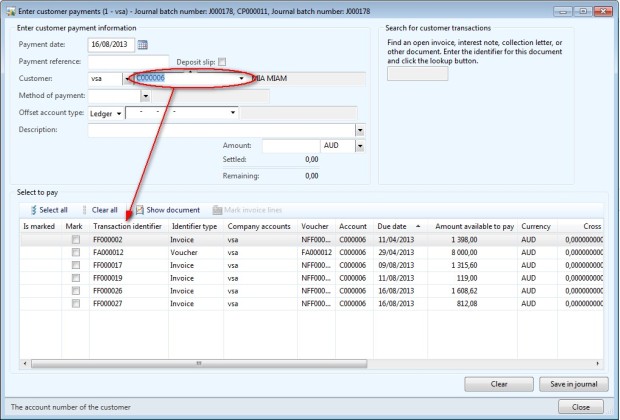
- Select a customer,
- All open invoices appear in the bottom screen.
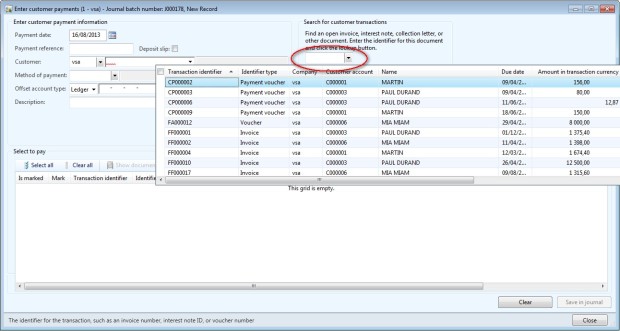
- Or you can search directly by the invoice number or other reference
- Enter a reference payment.
- Enter a description.
- Enter the offset account (bank account).
- Enter the total amount of the payment in the field “Amount”.
- Select invoices paid.
- Click on “Save in journal”.
- If you need to create others payments, select a customer and proceed as described abve.
- Close the form.
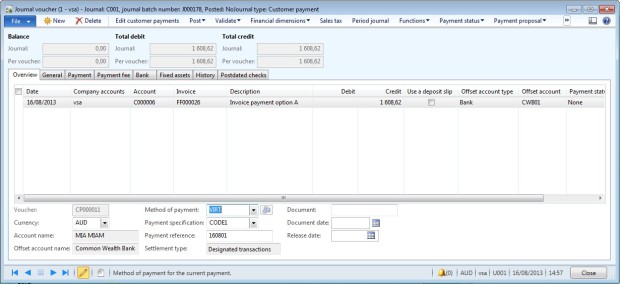
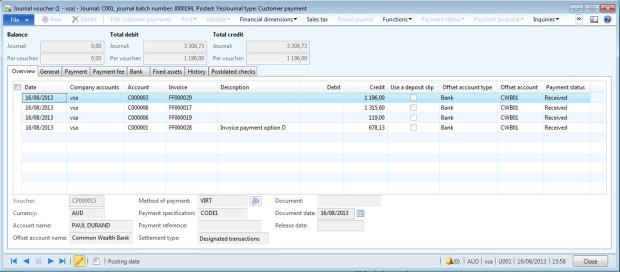
- Go to the lines of the journal
- All the informations are filled,
- Check and complete if necessary.
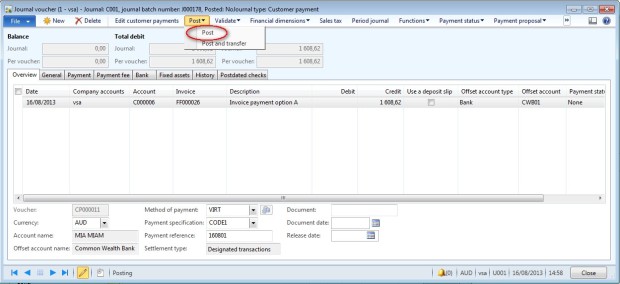
- Post the journal.
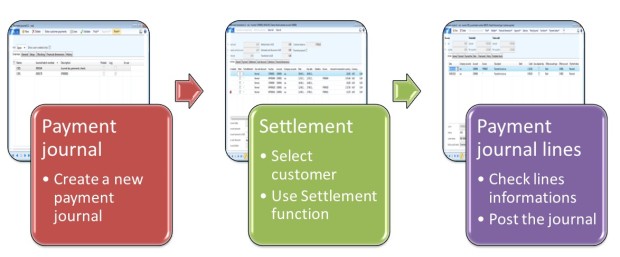
Option B: Payment journal & Settlement function
This option is useful when we need to create payments for one customer.
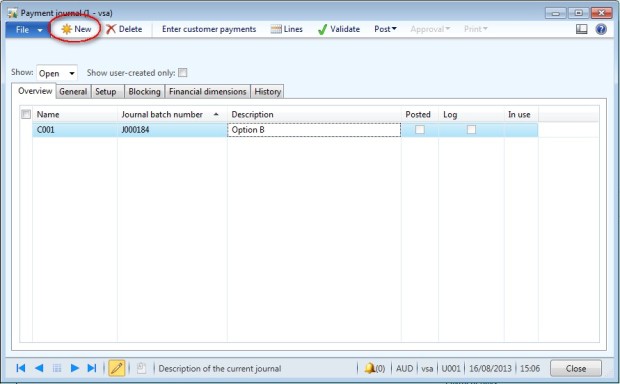
Access: AR > Journal > Payments > Payment journal
- Create a new journal : click on new.
- Select a journal name.
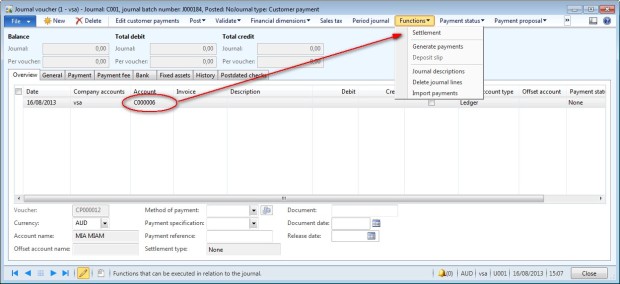
- Click on “Lines”
- In the field “Account’ select the customer account.
- Click on Function> Settlement
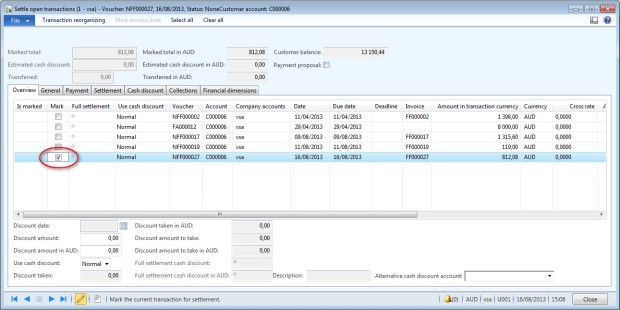
- Select invoices to pay
- And close the form.
- Informations about invoices are filled.
- Enter a description,
- And the offset account (bank account)
- Complete other informations if needed: payment reference, …
- And Post the journal.
Option C: payment journal and payment proposal.
This option is useful when we need to create payments for several customers in one journal. For example, all payments at due date pay by direct debit, …
Access: AR > Journal > Payments > Payment journal
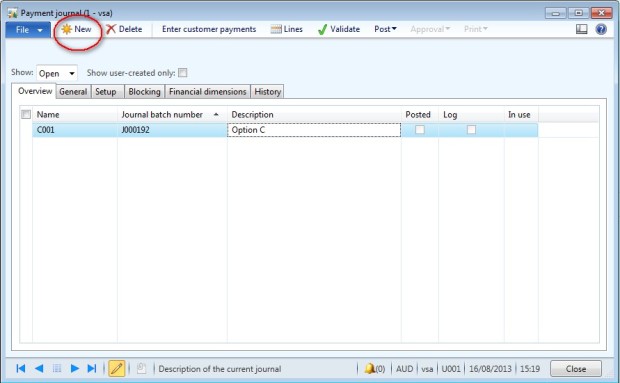
- Create a new journal : click on new.
- Select a journal name.
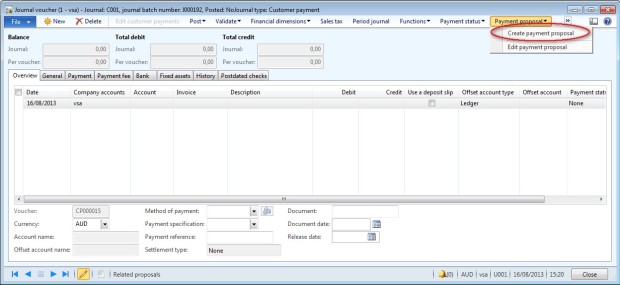
- Click on “Lines”
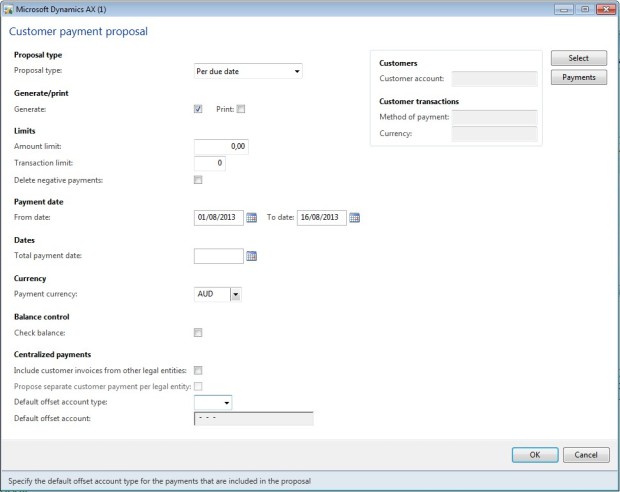
- Go to “Payment proposal > Create a payment proposal”
- Select options of you search: proposal type, due date, currency, methods of payment, …
- Click on Payment to print a report.
- In the Customer payment proposal form, check the invoices to pay.
- Unselect invoices or customer if needed.
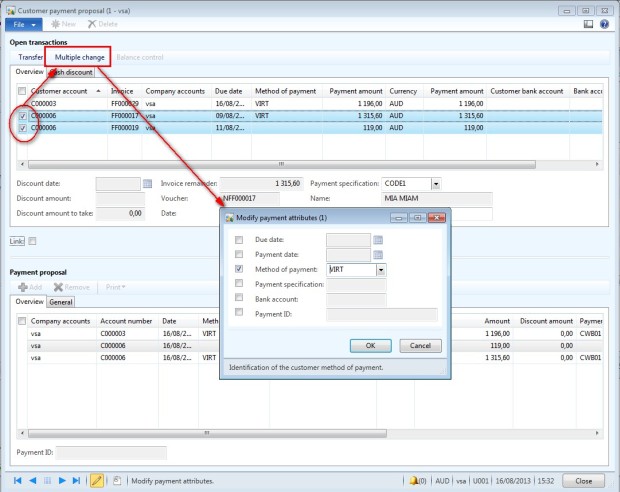
- If you need to update an information for several lines (method of payment for example),
- Select invoices to update.
- Click on “Multiple change”.
- Enter the new method of payment (or other).
- And click on “OK”.
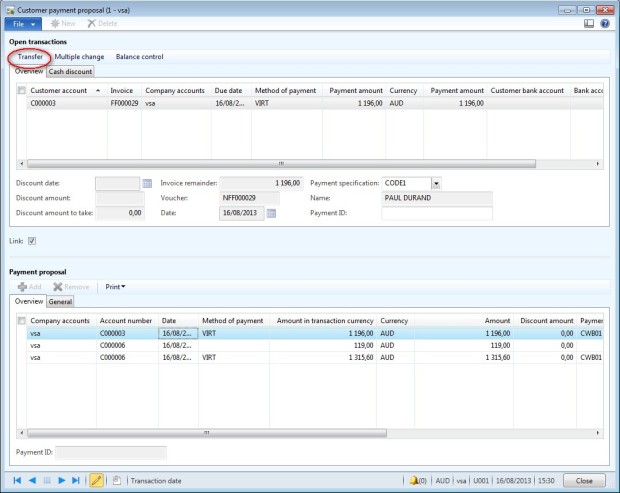
- The informations in the top screen are the details of the lines in the bottom of the screen (if the field Link is selected).
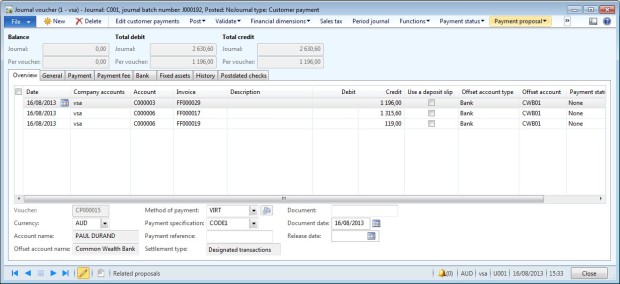
- Click to “Transfer” to transfer all the informations in the journal lines.
- Complete informations in the journal lines if needed
- Post the journal
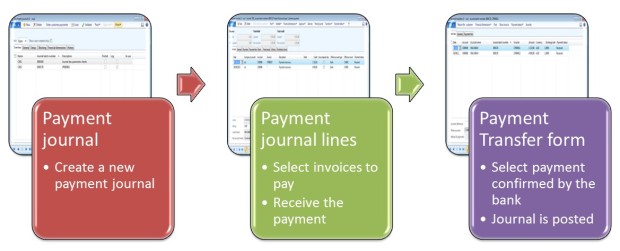
Option D: payment journal and posting in Transfer form.
This option can be use in addition with the three other options. This option is useful when a customer payment is done in two times,like a payment by cheque :
- when you receive the cheque, you create the journals lines (you can use one of the three other options to create the journal lines).
- And when you receive the bank confirmation, you can post the payment by using the transfer form.
Receive the payment: Payment journal
Access: AR > Journal > Payments > Payment journal
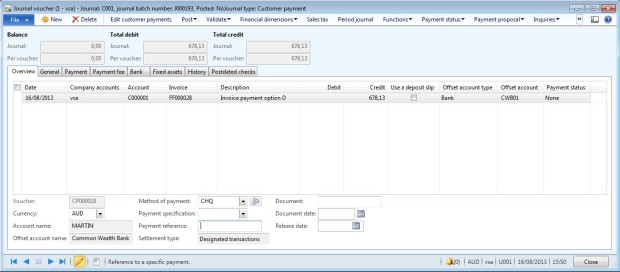
- Create a new payment journal
- Go to the line
- Select invoices to pay and complete journal lines
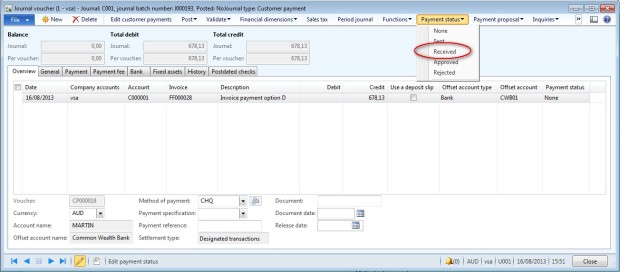
- Setup the payments status to “Receive”
- Go to “Payment status > Received”
- Close the journal
Bank confirmation: Payments Transfer form
Access: AR > Journal > Payments > Payments transfer
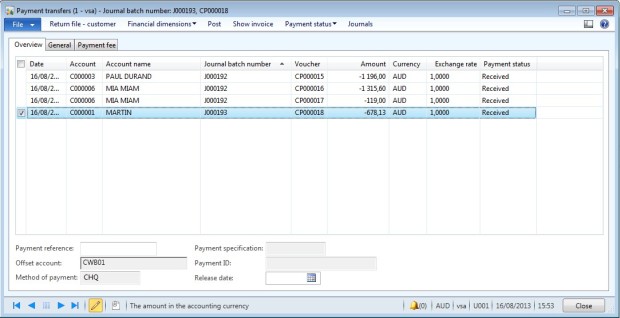
- Open the Payments transfers form
- Click on “Post”
- Select payments confirmed by the bank.
- Post the payment.
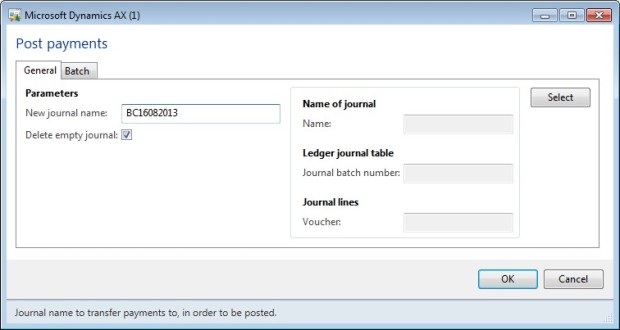
- Enter a journal name.
- Click on “OK”.
- A new journal is created and posted
No comments:
Post a Comment