Vendor invoice pool excluding posting details
This article describes how to use the vendor invoice pool excluding posting details in Dynamics AX2012.
The invoices remain in the Vendor invoice pool excluding posting details journal until a user moves them into another journal for posting. The invoices are not posted to a temporary arrival account as are the invoices that are entered and posted in the Invoice register journal.
1/ Step 1: Create an invoice in the invoice pool
Access: AP > Journals > Invoices > Vendor invoice pool excluding posting details
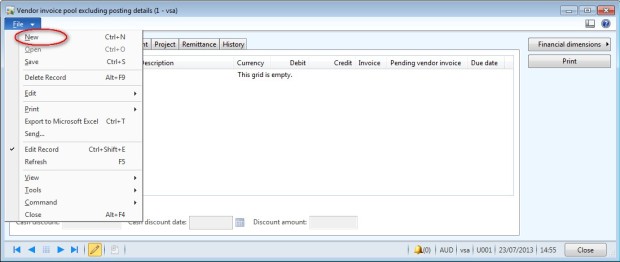
- Create a new journal : click on “File > New”
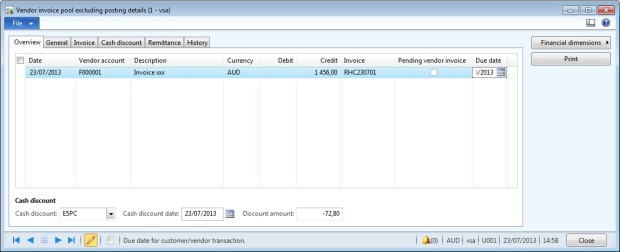
- Select vendor account.
- Enter a description in the field “description”.
- Enter the total invoice amount in the filed “Credit”.
- Enter the invoice number in the field “Invoice”.
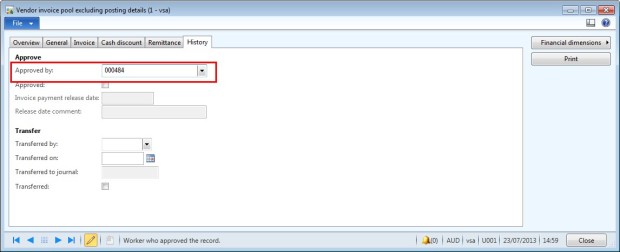
- In the tab “History”, select the person who will approve the invoice
2/ Step 2: approve and validate the invoice
Access: AP > Journals > Invoices > Invoice journal
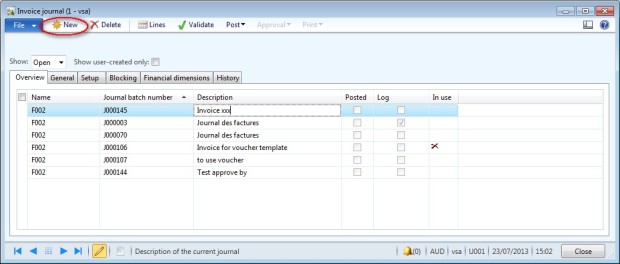
- Create a new journal:
- Click on new
- Select the name of the journal
- Enter a description in the field “Description”
- Create lines and select invoice to approve:
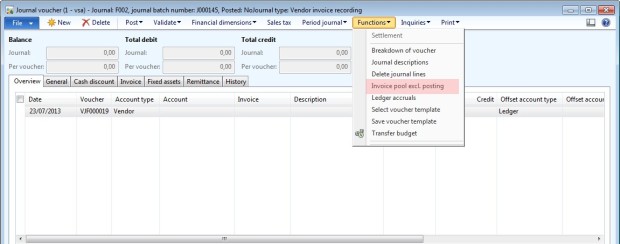
- Click on Lines.
- Click on Functions > Invoice pool excl.posting.
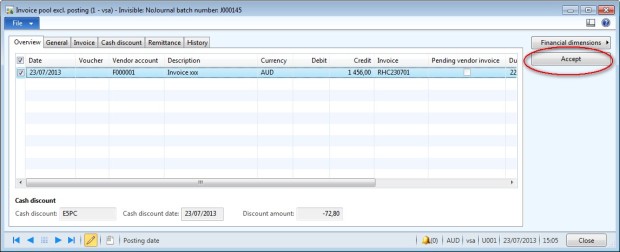
- Select invoice to transfer in the journal.
- Click on Accept.
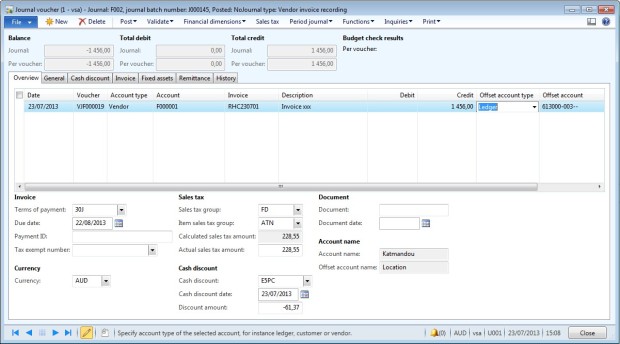
- Enter an offset account.
- In the tab “Invoice” check the field “Approved”.
- Update other data if needed.
- Post the invoice : click on Post > Post.
No comments:
Post a Comment