Invoice register
The objective of this article is to describe how to use the invoice register functionality in Dynamics AX2012
The invoice register is use to pre-register invoices when they arrived in the company with few informations (vendor account, invoice number, amount and approval person). Then, invoices are transferred in pool of invoices to approve.
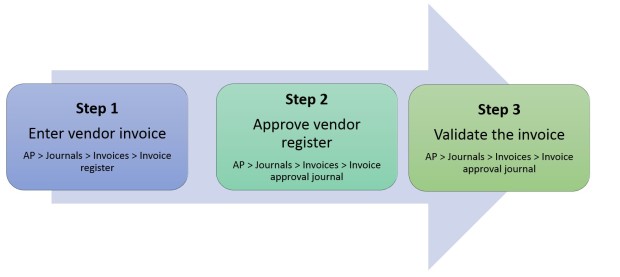
1/ Step 1: Enter vendor invoice
Access: AP > Journals > Invoices > Invoice register
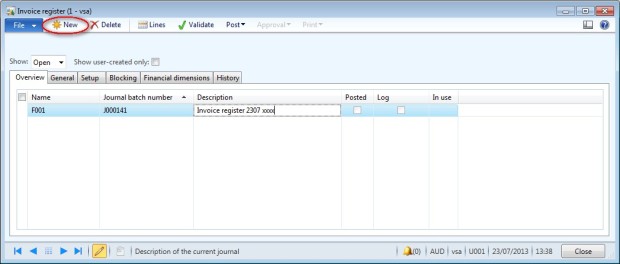
- Create a new journal
- Click on new
- Select the name of the journal
- Enter a description in the field “Description”
- Create one or several lines:
- Click on Lines.
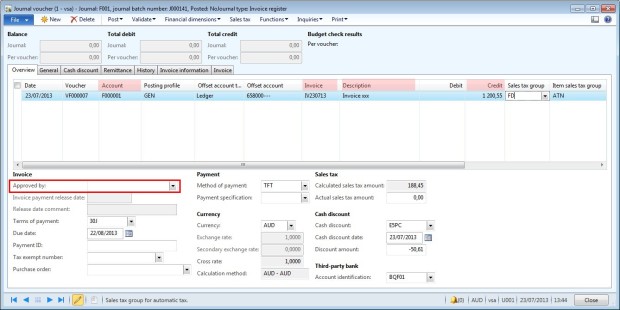
- Update the date if necessary.
- Select a vendor account in the field “Account”.
- Enter the invoice number in the field “Invoice”.
- Enter a description in the field “Description”.
- Enter the amount of the invoice in the field “Credit” or in the field “Debit” if it is a credit note.
- Select the person who must approve the invoice in the field “Approved by”.
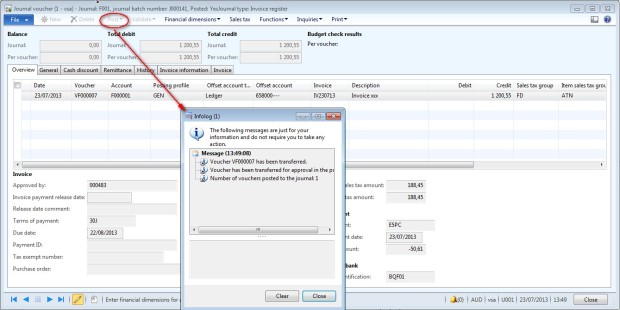
- Validate the invoice:
- Click on “Validate” to check if the document is correct.
- Click on “Post” to post the document
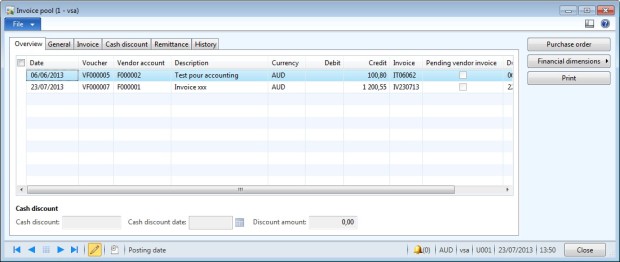
Remark: To search all the invoices waiting for approval, go to: AP > Inquiries > Invoice pool.
2/ Step 2: Approve invoice register
Access: AP > Journals > Invoices > Invoice approval journals
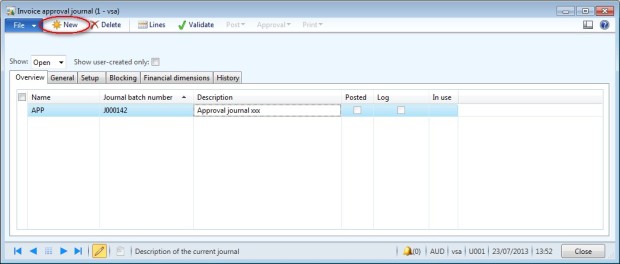
- Create a new journal
- Click on new
- Select the name of the journal
- Enter a description in the field “Description”
- Create lines and select invoice to approve :
- Click on Lines.
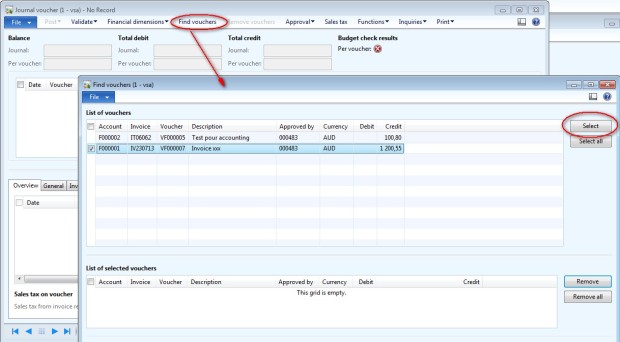
- Click on fine voucher.
- In the Find voucher screen:
- Select invoices to approve
- Click on Select
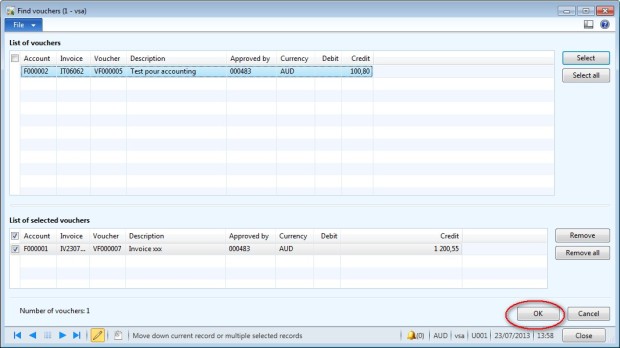
- When all your invoices are selected, click on Ok to transfer invoices in the journal.
- The invoice is transferred in the journal.
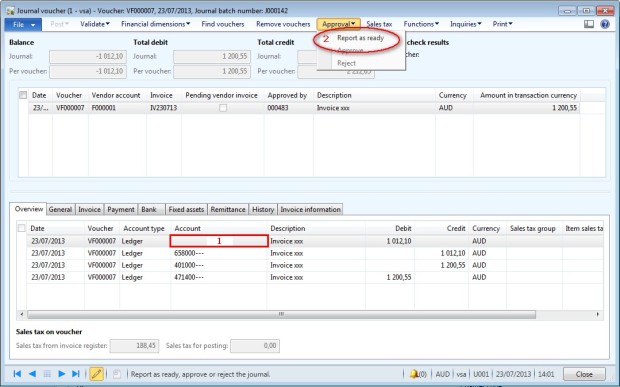
- Enter an account for the first debit line
- In the menu “Approval” select Report as ready.
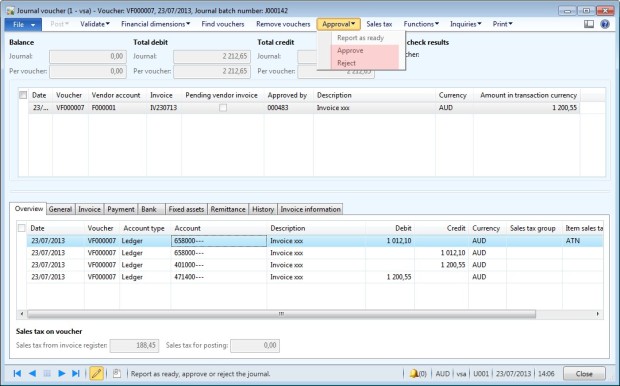
- For the approval user: In the menu “Approval” select “Approve” if the invoice is correct, or “Reject” if the invoice is not approved.
3/ Step 3: Validate the invoice
Access: AP > Journals > Invoices > Invoice approval journals
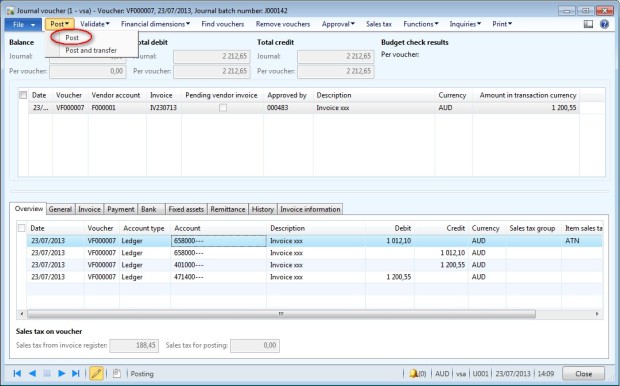
- Validate the journal:
- Click on “Validate” to check the information
- Click on “Post” to post the journal in the accounting
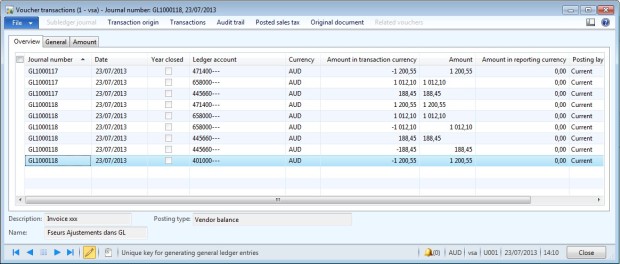
- Check accounting: click on Inquiries > Voucher
No comments:
Post a Comment